Elbow Lever: Hand Position, Hold Times and Progression
How to do the elbow lever: where your hands and elbows go, what 15 published guides recommend and where they disagree, and a 4-stage progression.
On iPhone

Military Calisthenics Coach
Take the drill with you
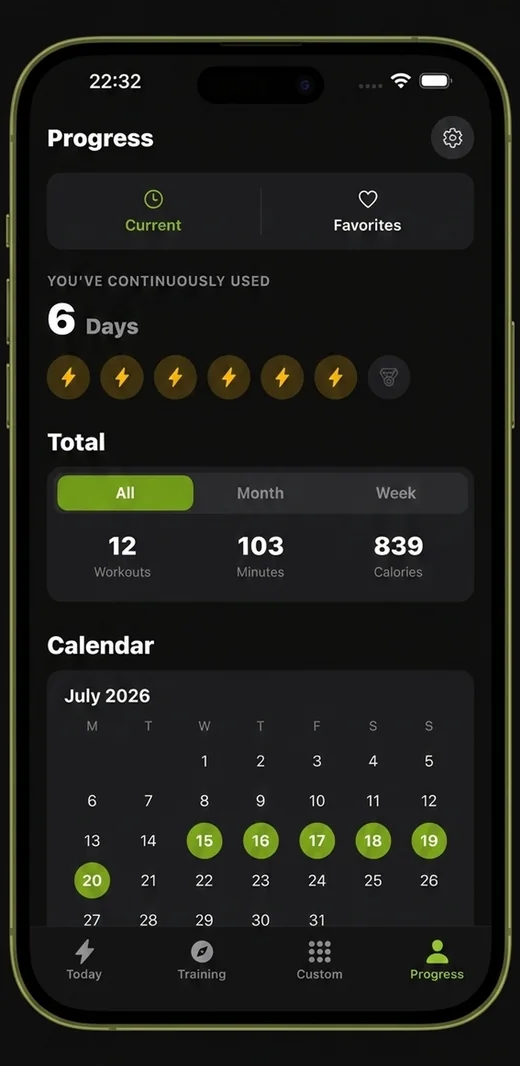
Military Calisthenics Coach is a 21-day military-style calisthenics program for iPhone: one guided bodyweight workout a day, with timed sets and rests, ranks and streaks. It is a separate program from the guides on this site.
- A 21-day military-style program, one workout a day
- Guided timed sessions — no counting, no guessing
- Build your own sessions by time, body zone or focus



An elbow lever is a hand balance in which you rest your belly on your bent elbows, hands flat on the floor, and tip forward until your straight body floats level above the ground. Most of the work is placing your hands and elbows correctly and leaning far enough forward, not raw strength. Start with a toes-down lean (3 holds of 20 seconds), then build to 3 holds of 10 seconds at each harder stage, and work toward a 30-second full hold.
This guide covers where your hands and elbows go, what 15 published guides recommend and where they disagree, a readiness test, a four-stage progression with a target for every stage, and the mistakes that stop most first attempts.
Key takeaways
- Guides disagree on hand position. Of the 15 we reviewed, 6 let the fingers point back or out, 4 say out, 3 say back and 2 do not say. None says forward.
- They also disagree on the elbow spot: 6 put the elbows in the belly or at the navel, 2 in the hip bones, and 7 between two areas or in more than one (from near the bottom of the ribs to the hip bones). Test the spot on your own body rather than copying one guide.
- Only 8 of the 15 give any number of seconds, sets or reps. Seven of them give hold targets for the lever or its stages, from 3 to 5 clean seconds up to a one-minute hold; the eighth (Fat Burn Fitness) gives numbers only for assisted (“de-loaded”) levers and a prep drill.
- Ten of the 15 tell you to warm up or prepare your wrists, but only one suggests a soft surface in front of you. Put a cushion where your face would land if you tip forward.
- We found no study that tested the elbow lever. PubMed reports the phrase as not found, so muscle lists and benefit claims come from coaches, not measurements.
What the elbow lever trains
| Body part | What it does in the hold |
|---|---|
| Shoulders, chest and triceps | Hold the elbows bent at about 90 degrees under your body weight |
| Forearms and wrists | Take the load through flat palms in a deep wrist bend |
| Abs and obliques | Brace against the elbows and stop the body folding |
| Lower back, glutes and hamstrings | Keep the legs lifted level with the head |
This table describes what each area has to do in the position. It is not from lab measurements: we found no study that measured muscle activity in the elbow lever (see How we got this). Seven of the 15 guides list muscles. All seven name the abs or core, six name the shoulders, five the triceps, five some part of the back, four the chest and three the glutes.
How to do an elbow lever
- Set up. Kneel on the floor with a cushion or folded towel where your face would land if you tipped forward. Warm up your wrists first (the handstand wrist routine takes two minutes).
- Place your hands. Put your palms flat, about shoulder width or a little narrower, with the fingers pointing back toward your knees or out to the sides. Use whichever your wrists tolerate.
- Bend the elbows into your belly. Keep them close together and press them into your stomach, just below the navel to start.
- Lean forward. Walk your feet back so your legs are straight and your toes are on the floor. Shift your shoulders forward of your hands until your weight is on your elbows and your toes feel light.
- Lift the legs. Squeeze your glutes and legs together and keep leaning until your toes leave the floor. Your head, hips and heels should end up in one level line.
- Come down by bending your knees and lowering your toes, not by dropping your head.
The yoga version. Yoga’s peacock pose (mayurasana) is the same basic shape. Yoga International’s chair-supported tutorial tells you to turn your arms out “so that your fingertips face your torso” and to “wedge that elbow as low into your abdomen as you can (preferably right above your belly button)” (Jeraci, Yoga International). That tutorial supports the hips on a chair and puts the hands on blocks, set as close together as possible.
Where to put your hands and elbows
This is where the published guides disagree most, and it is the part that decides whether your feet leave the floor.
Fingers: back or out, never forward. Six of the 15 guides allow back or out, four say out, three say back and two do not say. Progresspedia puts it plainly: “pointing backwards or out to the side - never straight forward.” Try both directions and keep the one your wrists tolerate without pain.
Elbows: test the spot. Progresspedia wants the elbows “around the centre of your body - not up in the ribs, not down on the hips”. Fat Burn Fitness names the hip bones instead: “dig your elbows into the crevices of your hip bones”, adding that for most people that area “will be about midline”. Summer Fun Fitness says the closer to the hips the better “especially if you carry more weight in your lower half”. Use this rule:
- Start just below the navel, elbows close together.
- If your feet will not lift even when your shoulders are well past your hands, move the elbows a little lower, toward the hip bones.
- If the elbows dig in painfully or slide off, move them a little higher.
Elbows close, not jammed. Five of the 15 guides tell you to keep the elbows close together or touching. Strengthcraft adds a check from the other side: “If you are unable to breathe into your stomach, your elbows could be too close together.” Start close and widen them slightly if you cannot breathe.
What 15 elbow lever guides recommend
We collected 15 English-language elbow lever guides from Google’s US results and related searches on 13 November 2026 and coded what each one tells readers to do. Page one of Google for “elbow lever” was mostly YouTube, short videos, Reddit and Facebook, with two written guides (Summer Fun Fitness and Hybrid Calisthenics).
| What we checked | Guides (of 15) |
|---|---|
| Fingers back or out (either allowed) | 6 |
| Fingers out to the sides | 4 |
| Fingers back toward the feet | 3 |
| Finger direction not stated | 2 |
| Elbows in the belly or at the navel | 6 |
| Elbows in the hip bones | 2 |
| Elbows: between two areas, or more than one area named | 7 |
| Keep the elbows close together | 5 |
| Give any number (seconds, sets or reps) for practising | 8 |
| Tell you to warm up or prepare the wrists | 10 |
| Suggest a soft surface in front of you | 1 |
| Estimate how long it takes to learn | 6 |
| List the muscles worked | 7 |
| Easier version: straddle (legs wide) | 9 |
| Easier version: tuck (knees bent) | 8 |
| Easier version: raised surface (parallettes, bench, box) | 6 |
| Easier version: toes on the floor while leaning | 5 |
Hold targets vary twentyfold. Seven guides give a hold target for the lever or its stages:
| Guide | Target | What it is for |
|---|---|---|
| Strong Supplement Shop | 3 to 5 clean seconds | Clean hold to aim for |
| Gymless (one-day guide) | 5 seconds | Hold each stage before moving on |
| Summer Fun Fitness | At least 5 seconds | Choose a stage you can hold this long |
| Calisthenics Corner | 15 seconds | Standard lever before harder versions |
| Strengthcraft | About 20 seconds | Hold each level before moving on |
| Hybrid Calisthenics | 3 sets of 30 seconds | Full elbow lever standard |
| Start Bodyweight | One 60-second hold | Final goal for the full lever |
Learning-time estimates are just as wide. Six guides comment on how long it takes to learn. The concrete estimates run from “often within ten minutes” for a first clean hold (Progresspedia) to “a minimum of 3 months” for people still working on the basics (Bodyweight Training Arena). Our progression below gives a target for every stage, so you can track it yourself instead.
How we got this. We took 26 URLs from the Google US results for “elbow lever” (via DataForSEO) and related web searches, excluding video and social posts. Four could not be collected (one did not respond, one returned 404, one blocked our script with 403 and one disallows crawlers). Reddit, which ranks on page one, blocks automated access and was not included. Hybrid Calisthenics spreads its ladder over eight pages, which we counted as one guide, leaving 15 guides. Each page’s full text was coded against a fixed codebook with a supporting quote for every field. One judgment call: the single “soft surface” guide (SmartWorkout) does not say it is for your face. We also searched PubMed for “elbow lever” and “peacock pose” on 13 November 2026; it reported both phrases as not found. A search for “mayurasana” found one record, about a different pose (the forearm stand, pincha mayurasana). The data covers one day of search results, and coding free text involves some judgment. With 15 pages, read these as counts, not percentages of all guides.
Find your starting stage
After a warm-up, check these three things:
- Wrists. Kneel with your palms flat and fingers pointing back toward your knees, then rock gently forward for 30 seconds. If it hurts, do the wrist routine for a couple of weeks before loading them in a lever.
- Push-ups. Do 10 clean push-ups. Both Progresspedia and Bodyweight Training Arena list 10 push-ups among their prerequisites (Bodyweight Training Arena also asks for 10 dips).
- Body tension. Hold a plank for 30 seconds (Progresspedia’s prerequisite) or a hollow body hold for 30 seconds (Bodyweight Training Arena’s).
Pass all three and start at stage 1. Progresspedia says you need very little to start and these make it “click faster”. Our rule is stricter: if you cannot do 10 push-ups or the 30-second hold yet, build those first.
The 4-stage elbow lever progression
Practice two or three times a week, at the start of a session, after your warm-up. Do 3 holds per session with 1 to 2 minutes of rest. Start each new stage with whatever clean hold you can manage and add a few seconds each session. Move up when you hit the target for all three holds: body level, elbows still in place, no sagging hips and no hopping out early.
| Stage | Exercise | Move up when |
|---|---|---|
| 1 | Toes-down lean | 3 × 20 seconds |
| 2 | Tuck elbow lever | 3 × 10 seconds |
| 3 | Straddle elbow lever | 3 × 10 seconds |
| 4 | Full elbow lever | 3 × 10 seconds, then build to a 30-second hold |
These targets are our own coaching rules, set inside the range the guides give (3 to 60 seconds). We know of no study that has tested them.
Stage 1: Toes-down lean. Set your hands and elbows as above, legs straight behind you, toes on the floor. Lean forward until your toes carry almost no weight and hold. This is where you find your elbow spot and your balance point without any risk of falling.
Stage 2: Tuck elbow lever. From the lean, bend your knees and draw them toward your chest as your toes lift. Keeping the legs folded close to your body makes the balance easier to control. Hold with your knees and feet off the floor.
Stage 3: Straddle elbow lever. Straighten your legs and open them wide. Bring them a little closer together as the hold gets easier.
Stage 4: Full elbow lever. Legs straight and together, squeezed from the glutes to the toes, body level from head to heels. Once you can hold 3 × 10 seconds, build toward a single 30-second hold.
Raised surface option. If your face is close to the floor or your wrists complain, do any stage on parallettes or a sturdy, low bench. Six of the 15 guides use a raised surface, and Summer Fun Fitness says it makes the lever “a lot easier” than the floor. Keep the surface low so any fall is short.
Tuck or straddle first? Hybrid Calisthenics puts its bent-knee and straddle levers in different orders on different pages of its own ladder. We put the tuck first because the folded legs stay close to your balance point, so small mistakes are easier to catch. If your hips are flexible and the straddle feels easier, swap stages 2 and 3.
Common mistakes and how to fix them
| What you notice | What is happening | Fix |
|---|---|---|
| Your feet will not leave the floor | Not leaning far enough, or elbows too high | Shift the shoulders further forward; move the elbows a little lower |
| You tip forward onto your face | Leaning past the balance point | Lean less; keep the cushion in place; look at the floor a little ahead |
| Elbows slide apart | Hands too wide or elbows not pressed in | Bring the hands closer; press the elbows into your belly before leaning |
| Hips sag or the legs drop | Glutes and legs relaxed | Squeeze the glutes and press the legs together |
| Wrist pain | Too much load too soon, or the wrong finger angle | Try the other finger direction; use parallettes; do the wrist routine |
| Pain where the elbows press | Elbows on a bony spot | Move them a little higher or lower, or wear a thicker shirt |
Where it fits in a workout
As a skill block. Do it early in a session, after the warm-up and before strength work, while you are fresh. Three holds take less than ten minutes.
Next to other hand balancing. It pairs well with the handstand progression, which shares the same wrist preparation. Train both on the same day, the elbow lever first.
After the full hold. Calisthenics Corner suggests a clean 15-second standard lever before one-leg and one-arm versions. Our full lever target of 30 seconds clears that.
Frequently asked questions
Where do your elbows go in an elbow lever?
Into your belly, close together. The 15 guides we reviewed do not agree on one spot: 6 say the belly or navel, 2 say the hip bones and 7 put them between two areas or name more than one, from near the bottom of the ribs (Strengthcraft) down to the hip bones. Start just below the navel and move the elbows lower if your feet will not lift.
Which way should your fingers point in an elbow lever?
Back toward your feet or out to the sides, whichever your wrists tolerate. Of the 15 guides we reviewed, 6 allow either, 4 say out, 3 say back and 2 do not say. None tells you to point them forward.
How long should you hold an elbow lever?
Aim for 3 holds of 10 clean seconds first, then build toward 30 seconds. The seven guides we reviewed that give a hold target for the lever or its stages range from 3 to 5 clean seconds up to a one-minute hold, so there is no agreed standard.
What muscles does the elbow lever work?
We found no study that measured it. Seven of the 15 guides we reviewed list muscles: all seven name the abs or core, six the shoulders and five the triceps. The arms hold a bent-elbow support while the trunk, glutes and legs keep the body straight.
Can the average person do an elbow lever?
If you can do 10 push-ups, hold a 30-second plank and have warm, mobile wrists, you meet the prerequisites Progresspedia lists. Calisthenics Corner calls elbow placement “the main hurdle”, not raw strength. The guides we reviewed estimate anything from “often within ten minutes” to “a minimum of 3 months” for people still working on the basics.
Is the elbow lever harder than a handstand?
Bodyweight Training Arena argues it is easier to balance: with bent arms “the center of gravity is lower compared to a handstand making this exercise a lot easier to balance”. Our handstand progression expects the first months to go into wrist and shoulder work.
Where to start
Check your wrists, push-ups and 30-second hold, then start with the toes-down lean and move up one stage at a time. Most of the progress comes from finding your elbow spot, so give stage 1 a few sessions even if it feels easy. When you are ready for a longer-term hand balance, the handstand progression uses the same wrist preparation.
Sources
- Jeraci AR. Mayurasana Made Easier: Use a Chair to Fly in Peacock Pose. Yoga International.
- PubMed search for “elbow lever” and “peacock pose”, run 13 November 2026: PubMed reported both phrases as not found.
- Guide survey data: 15 elbow lever guides collected 13 November 2026, coded by bestcalisthenicsworkout.com.
- Guides referenced by name: Progresspedia, Fat Burn Fitness, Summer Fun Fitness, Hybrid Calisthenics, Strong Supplement Shop, Gymless, Calisthenics Corner, Strengthcraft, Start Bodyweight, Bodyweight Training Arena, SmartWorkout.